The best indication that your swarm has been successful is when it’s expanded into a full sized colony. From a NUC beehive to a full hive, it’s a lot for the bees! Once the population has increased, you would be required to transfer your bees from a NUC to a full sized hive.
What is a NUC Beehive?

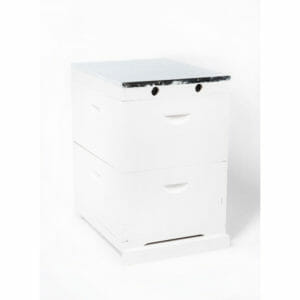
A NUC, also called nucleus hive, is a smaller sized hive ranging from 2 to 5 frames. It is usually used for a captured swarm that is only establishing itself to become a colony. If you would like to start beekeeping for business or for a hobby, this process is the perfect introduction.
Is your NUC almost full? Well it might just be the right time to transfer them into a proper, full sized hive.
From a NUC Beehive to a Full Hive
Here’s the steps you can follow when transferring a NUC beehive to a new, full-sized hive.
- Initially, decide where you intend to place your new permanent hive. Pick up your NUC and place it in the exact position where you want it. This will help the bees get used to their new environment.
- After a few days, move the NUC at least 1 metre in front of the planned hive position and place the new beehive in its place.
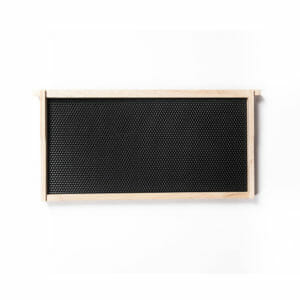
- Install new frames in the beehive. If you are using an 8 frame box, you’ll need 3 new frames to fill the box. While for a 10 frame box, you’ll need 5 frames. It’s also up to you whether you want frames with foundations.
TIP: If you would like an efficient honey production, frames with foundations is your best option. For natural beekeepers, you may skip the foundation!
- Place the new frames on the edges of the box.
- Transfer frames from the NUC, starting from the frames that are located in between the outside frames. Place the first frame in the new hive, ensuring that you will have enough space to place the outside frames.
- Transfer the outside frame and place it between the first frame and the new frame at the edge of the box. Push them gently up against the foundation.
TIP: While transferring frames, give each frame a quick inspection for brood and honey.
- Once all the frames are transferred, make sure that the queen has been transferred into the new beehive as well. If the queen is not in the new hive, the worker bees will start to rejoin her somewhere else.
- Shake off any bees that are left in the NUC into the new beehive. You wouldn’t want any of them lost!
- Ensure that the frames in the new hive have the appropriate distance with each other. Keep the NUC opened up next to the new beehive to allow any other bees to find their way to their new home.
- Put the lid on and give the bees a few days to get the new hive filled up!
Now that your bees are in a more spacious home, they will certainly fill this up in no time! Depending on the season, you’ll be able to harvest some honey in no time. Don’t forget to leave some for them though!
Interested in buying beekeeping tools and equipment in bulk and discounted price? For personalised advice on products and tips for beehive management, give us a call on 0488 010 840 or get in touch via email at [email protected]. Shop online here (free shipping for orders over $300)!